Tuesday, February 28, 2023

...and repeat. Turning a cheap straw hat to an 18th century bergere hat - the second time

 And a little bit of whining. I mean besides basking in the glow and success of my Aidah gown I've fully meant to do one more post on it, with a video me twirling in that dress, so you can see how it moves, adding a link to Leimomi's blog, so you can see what other testers made from the same pattern, but admittedly (though, let me know, if you would be interested in such a follow-up post), I have been run down with the virus my son brought home as an (unintentional) Valentine's day present. (No, it is not "the plague", we've tested that). By now I am more-or less okay, except for the cough that goes on for the second week now, and it is still so intense and painful, as it was at the beginning. So much so, that when I cough, all the muscles on my head (and my body) are straining, and making it hurt in places I had no idea I have muscles, that are capable of pain. Like my temples... or at the top of my head (not to meantion my diaphgram, and/or my lower abs, but I got muscles in my back hurting as well). 

Anyhow, right after making the Aidah, I've made a hat to go with it, and other summery, 18th century stuff, as let's admit it, my poppy hat, as lovely it is, very limited, being red as a monkey's arse... I mean a poppy. The method was similar than the one I used for the poppy hat, I raided all the used-stuff-sites (Vatera, FacebookMarketplace, and the likes) for straw-hats that have at least vaguely okay shape, and went from there. I think the pictures are self-explanatory, but if not, just ask!

Started out with a hat that were made from straw-ribbons.

If you pull on the appropriate thread, it is easy to take the stitches out. I wanted a somewhat flatter hat than my poppy-hat was, so I left even less from the top part.
I moistened the top part and steamed it flat with my iron.
Sewed it back on, hoping that the decoration will hide the seam.


Sewn together the lining for the crown.

In one of the hats I own, I sew that little technique to make it somewhat adjustable... I've tried. It did not work. Don't ask. I will use hatpins. 


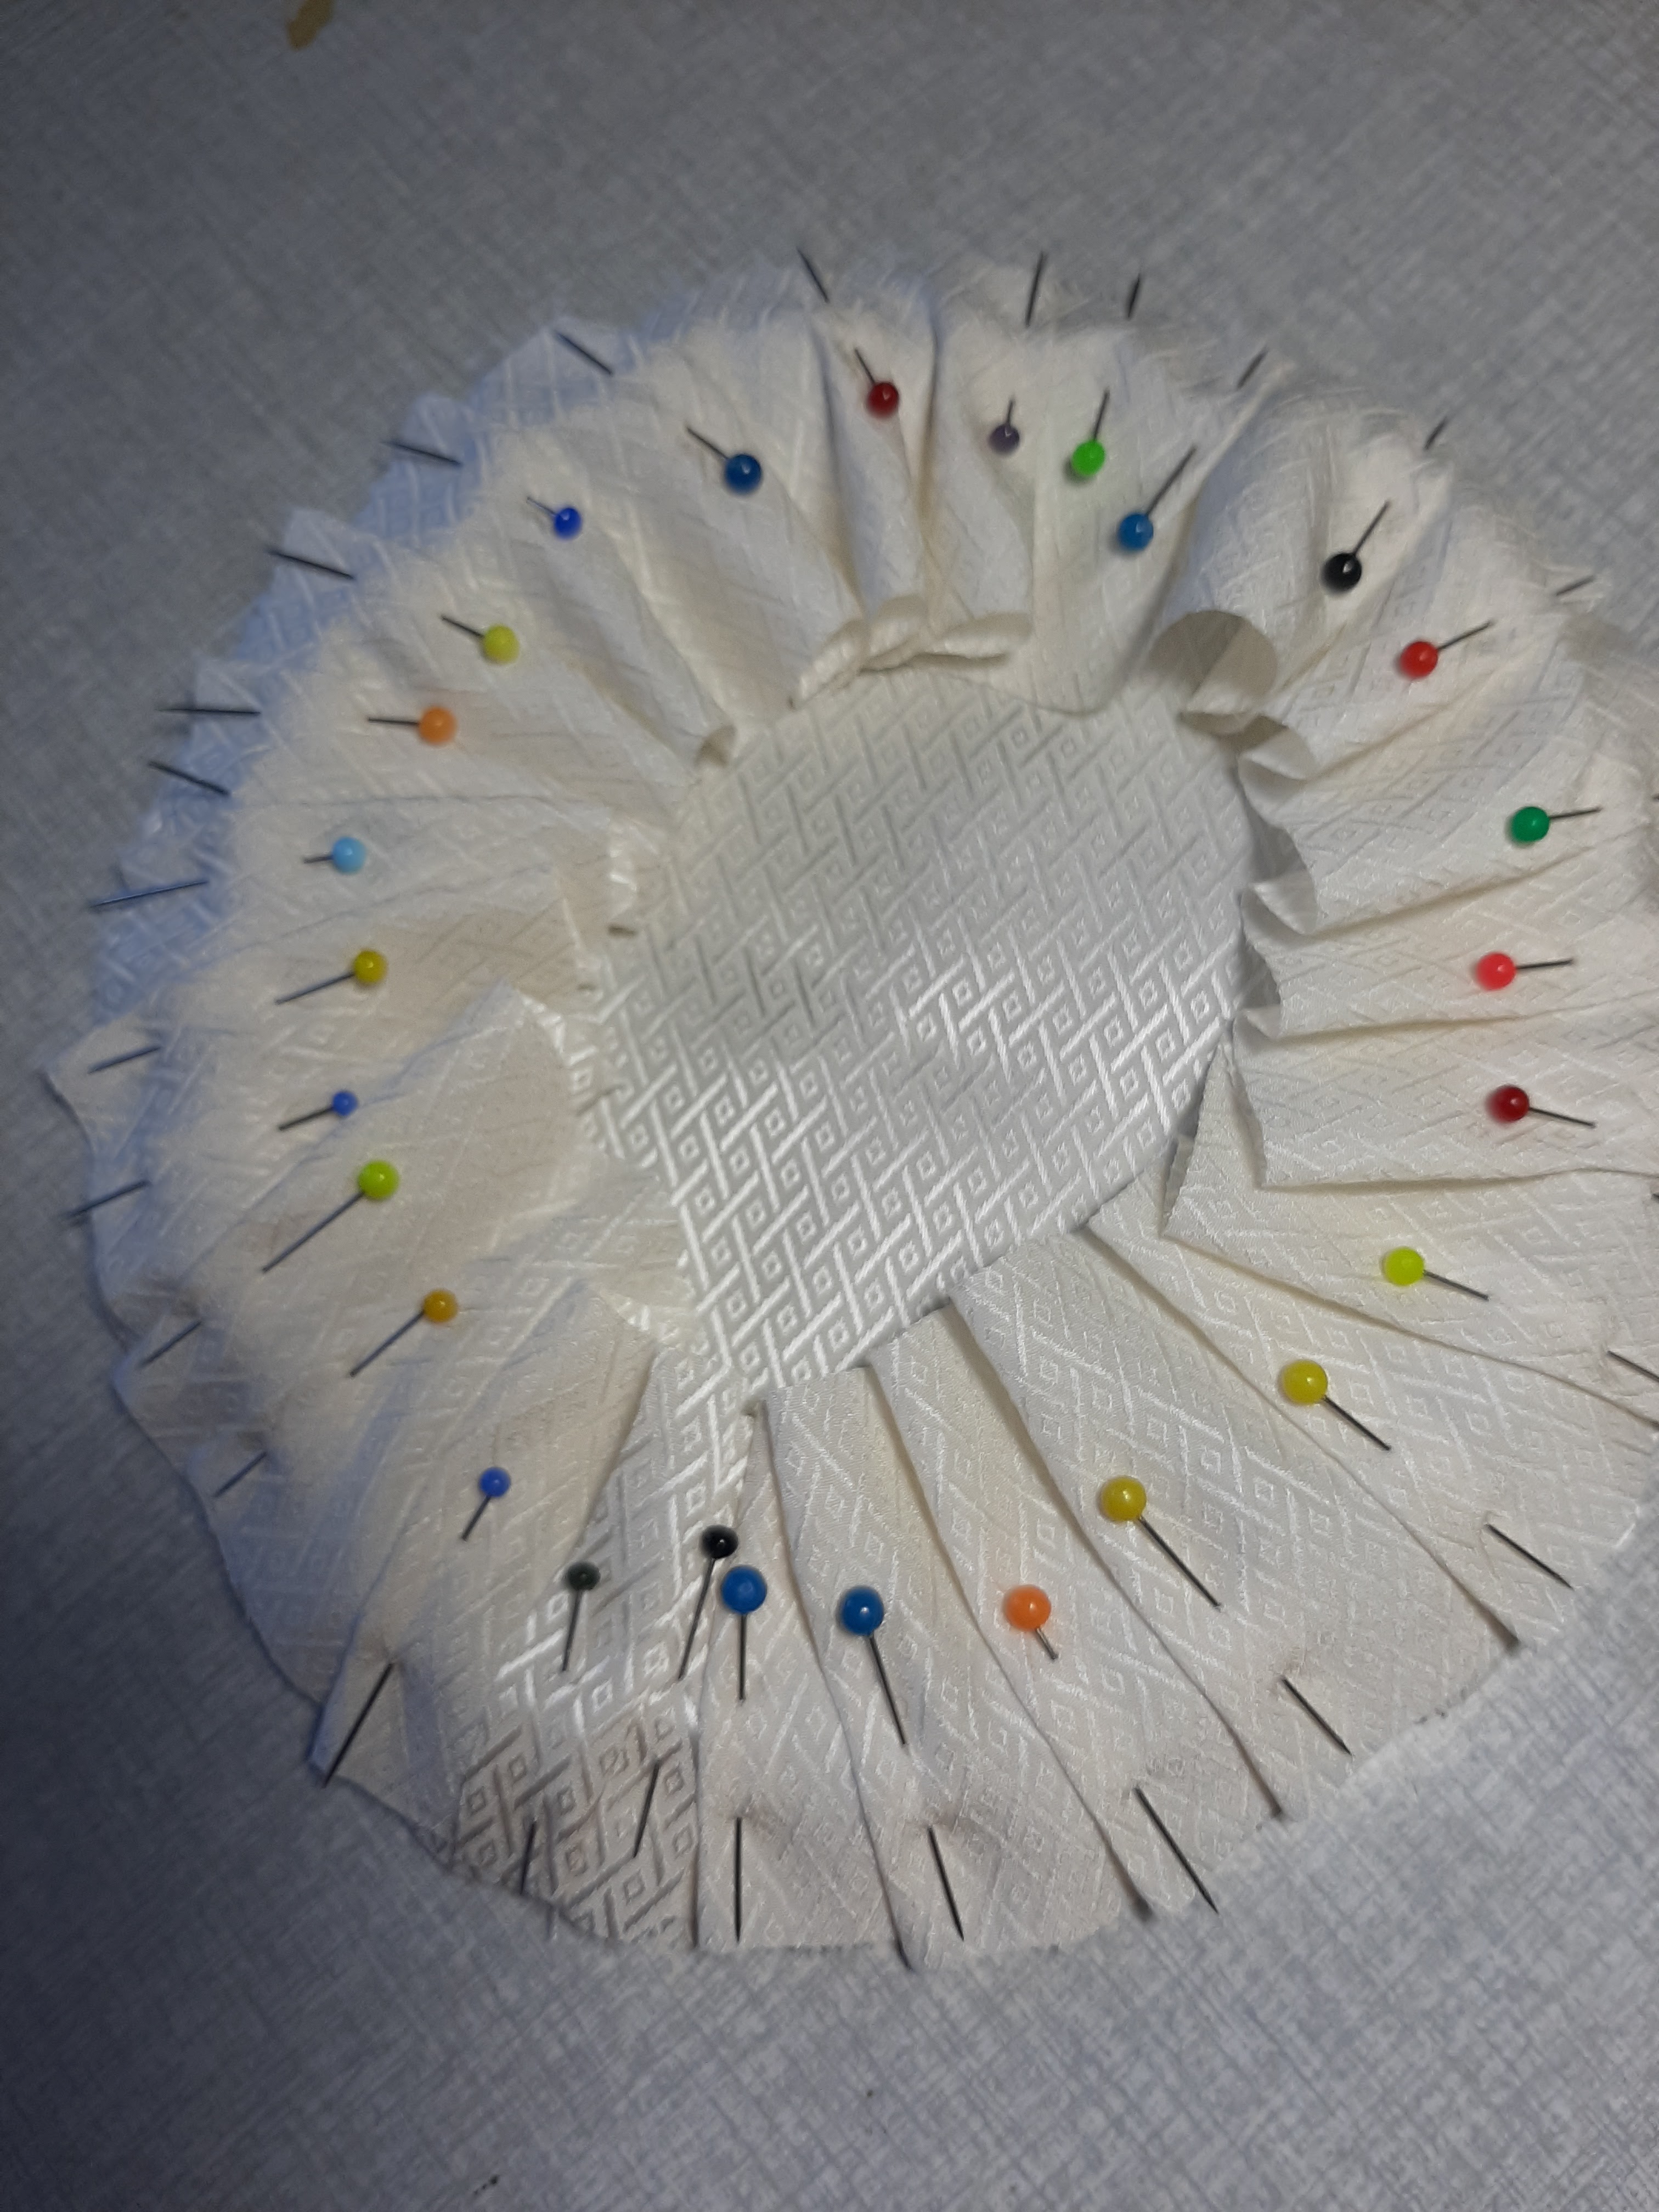
The deco from outside is a silk ribbon with box-pleats.
Since from the old drawings and paintings we know, that they didn't really used bergere-hats with the ties over them (as modern films tend to), but the ties went down just besides the crown, I cut the seam for about 2 cm on both sides, strengthened the ends with a couple of stitches, and pulled through the ribbon.


And then I sewed down the lining too. 
From outside, the flowery decorations were either stucked under the ribbon deco -between stitches, and sewn down, stitches hidden under the ribbon, others were stuck between, or under the already sewn down parts - no glue gun were used, only needle and thread. 

And what is a hat without some ostrich feathers, though for this one I wanted the white flowers take the center tsage, I only used a couple of feathers from the package of small, 10 cm ones.
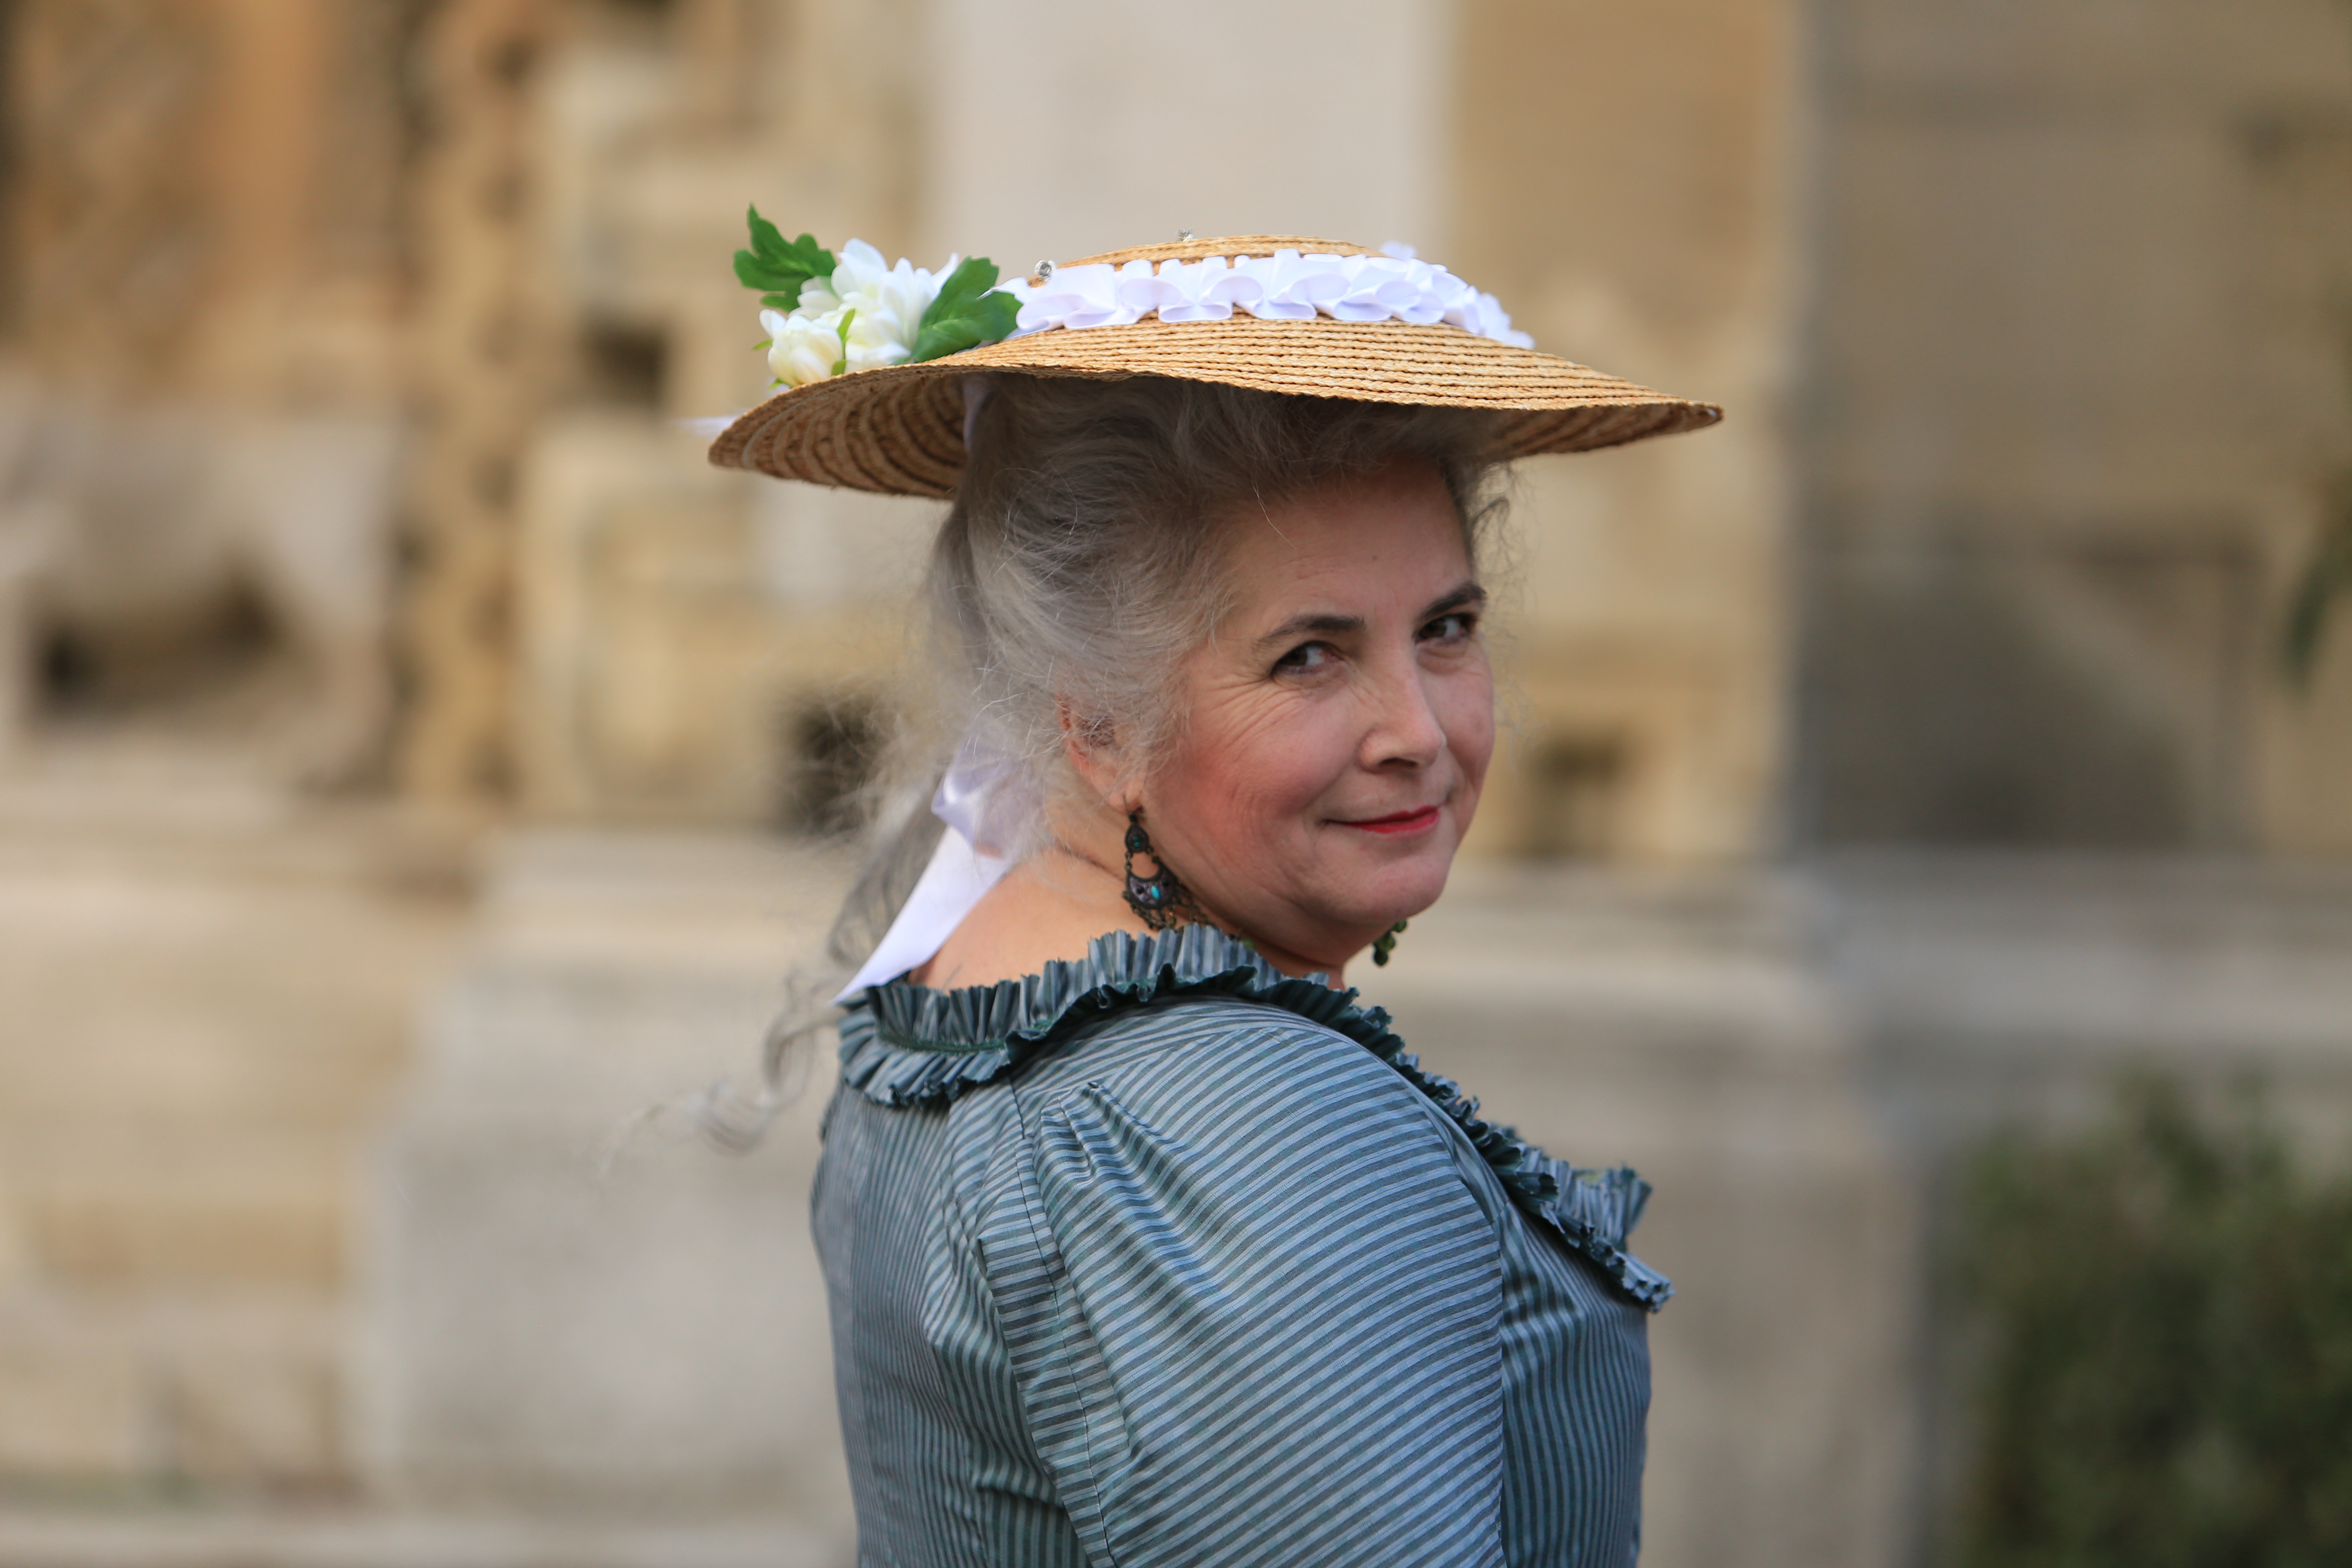
I took the hat with me, when we shot the photos of the dress.


And the afternoon was rather windy, I still have to practice pinning the hat to my hair... 
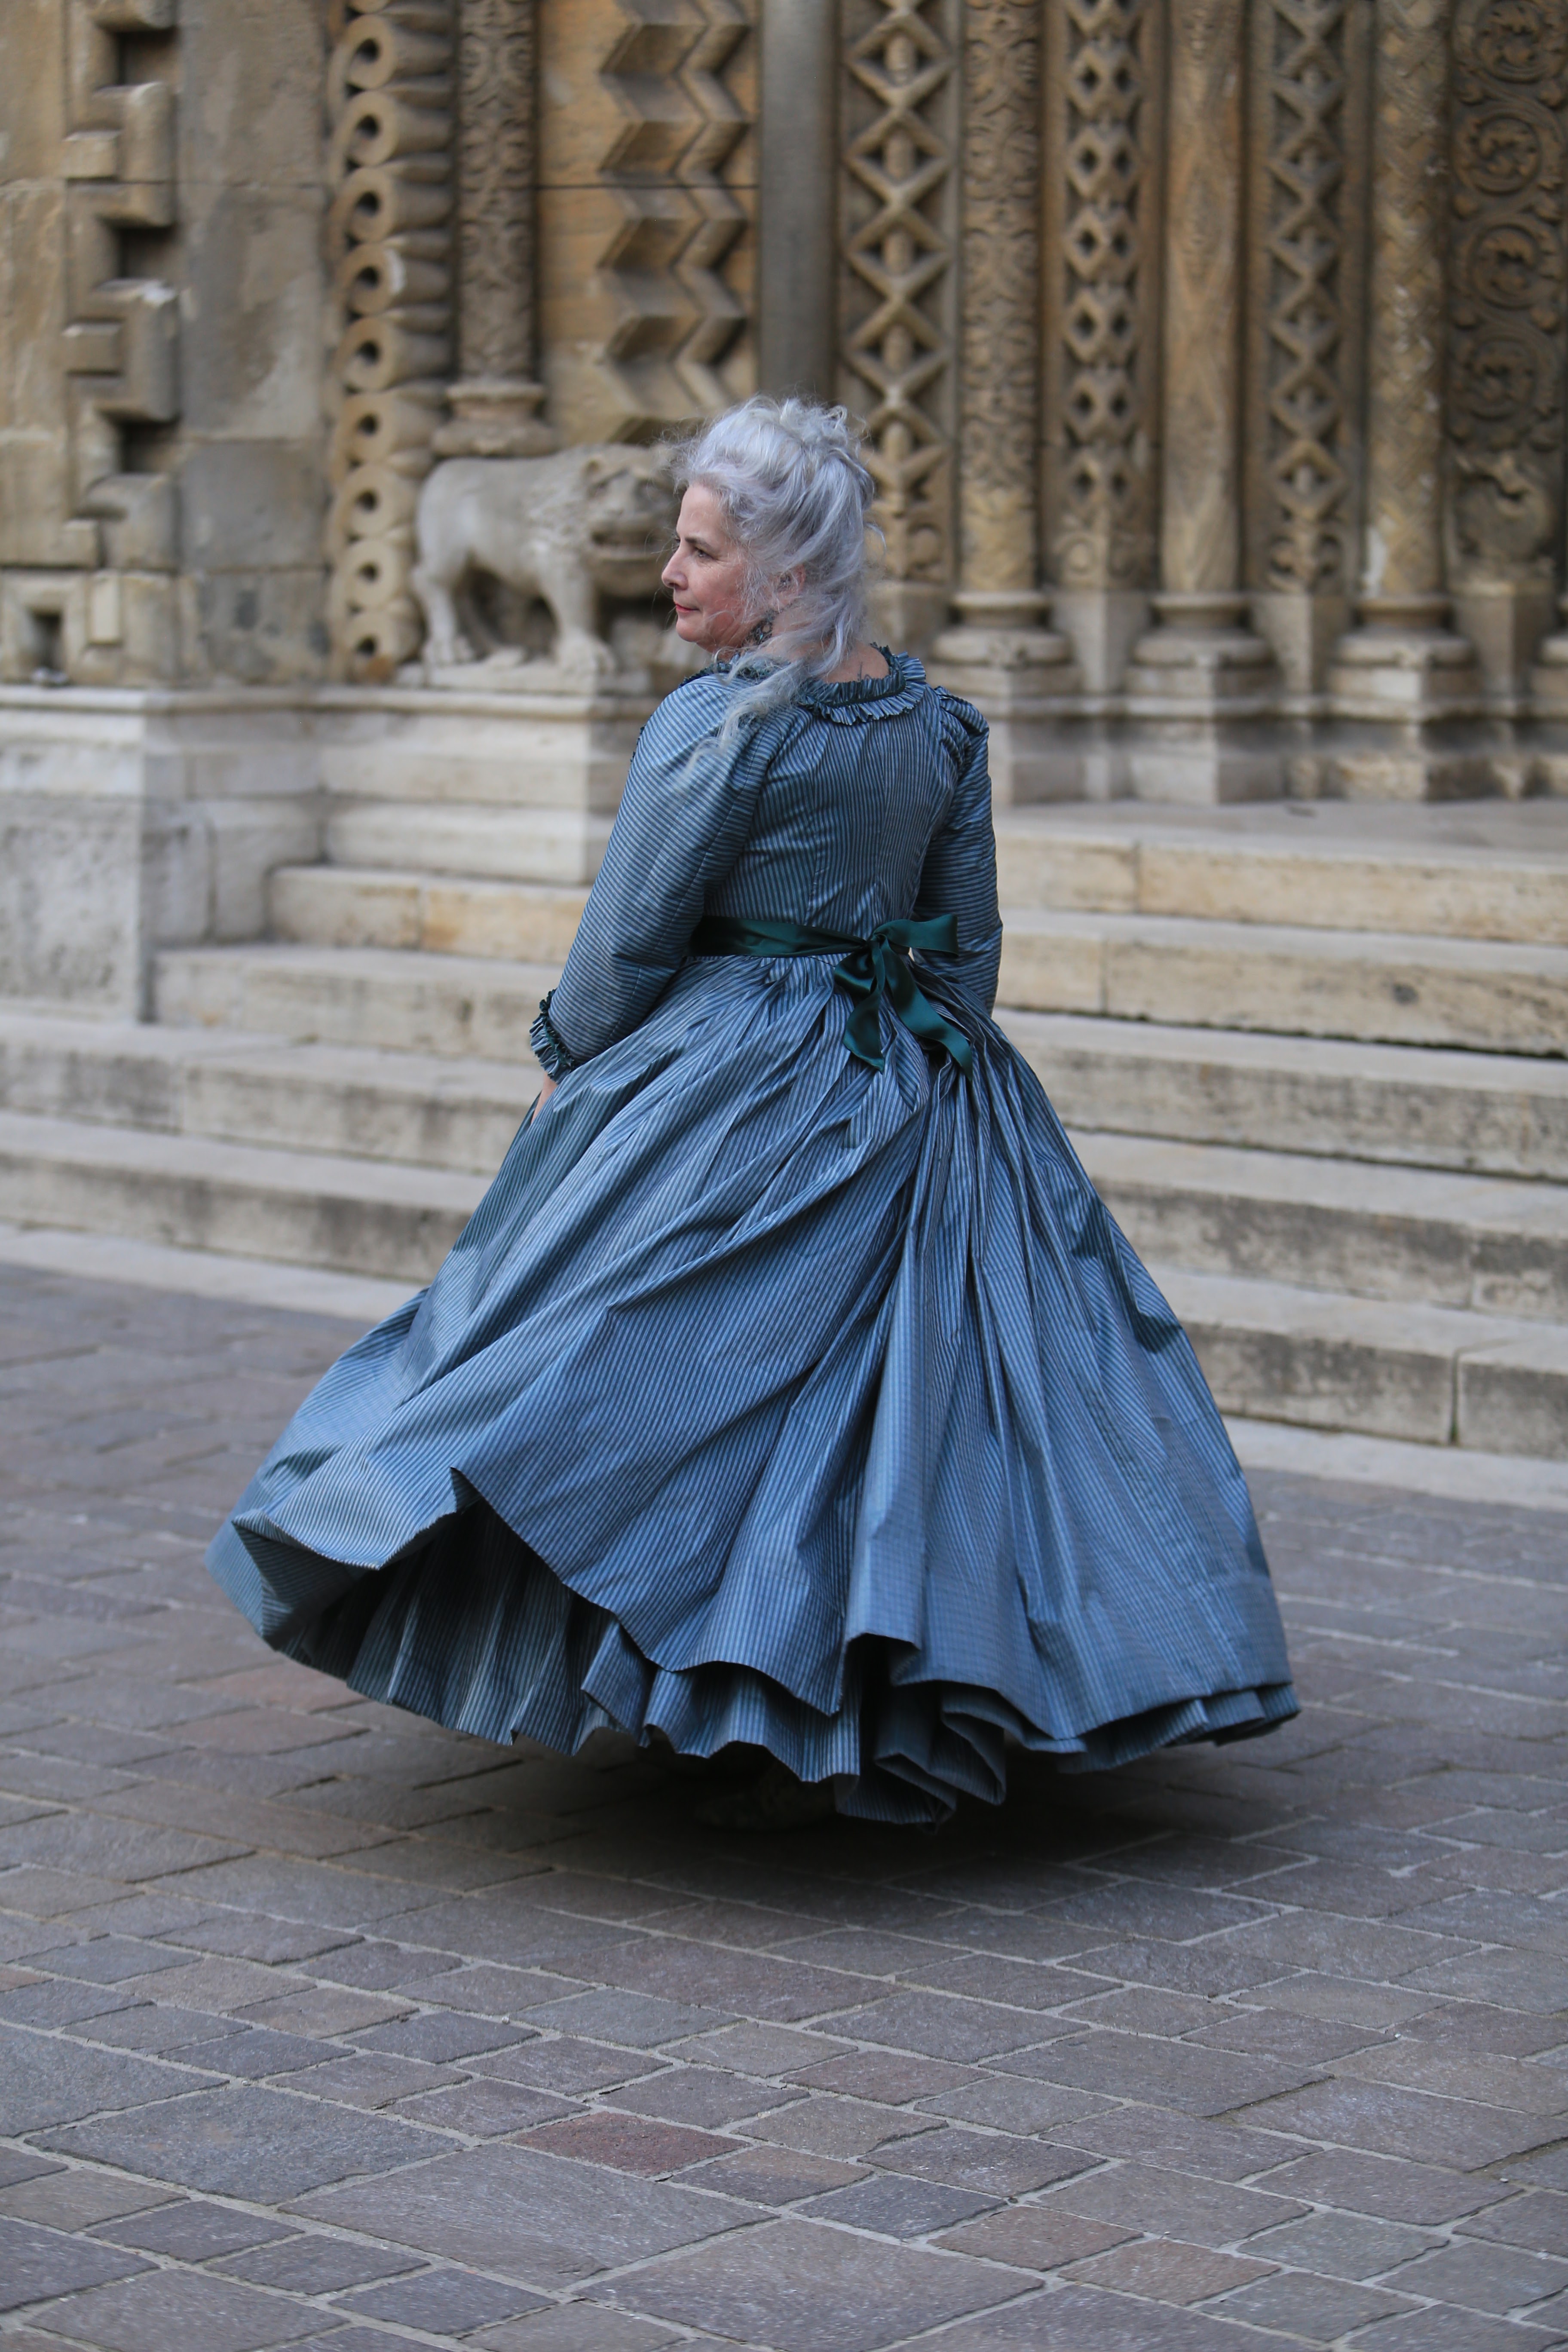
Dress is made from Scroop-patterns Aidah Gown pattern.
Work photos from my phone.
Modell photos by Norbert Varga @Bodeszphoto

Sunday, February 19, 2023

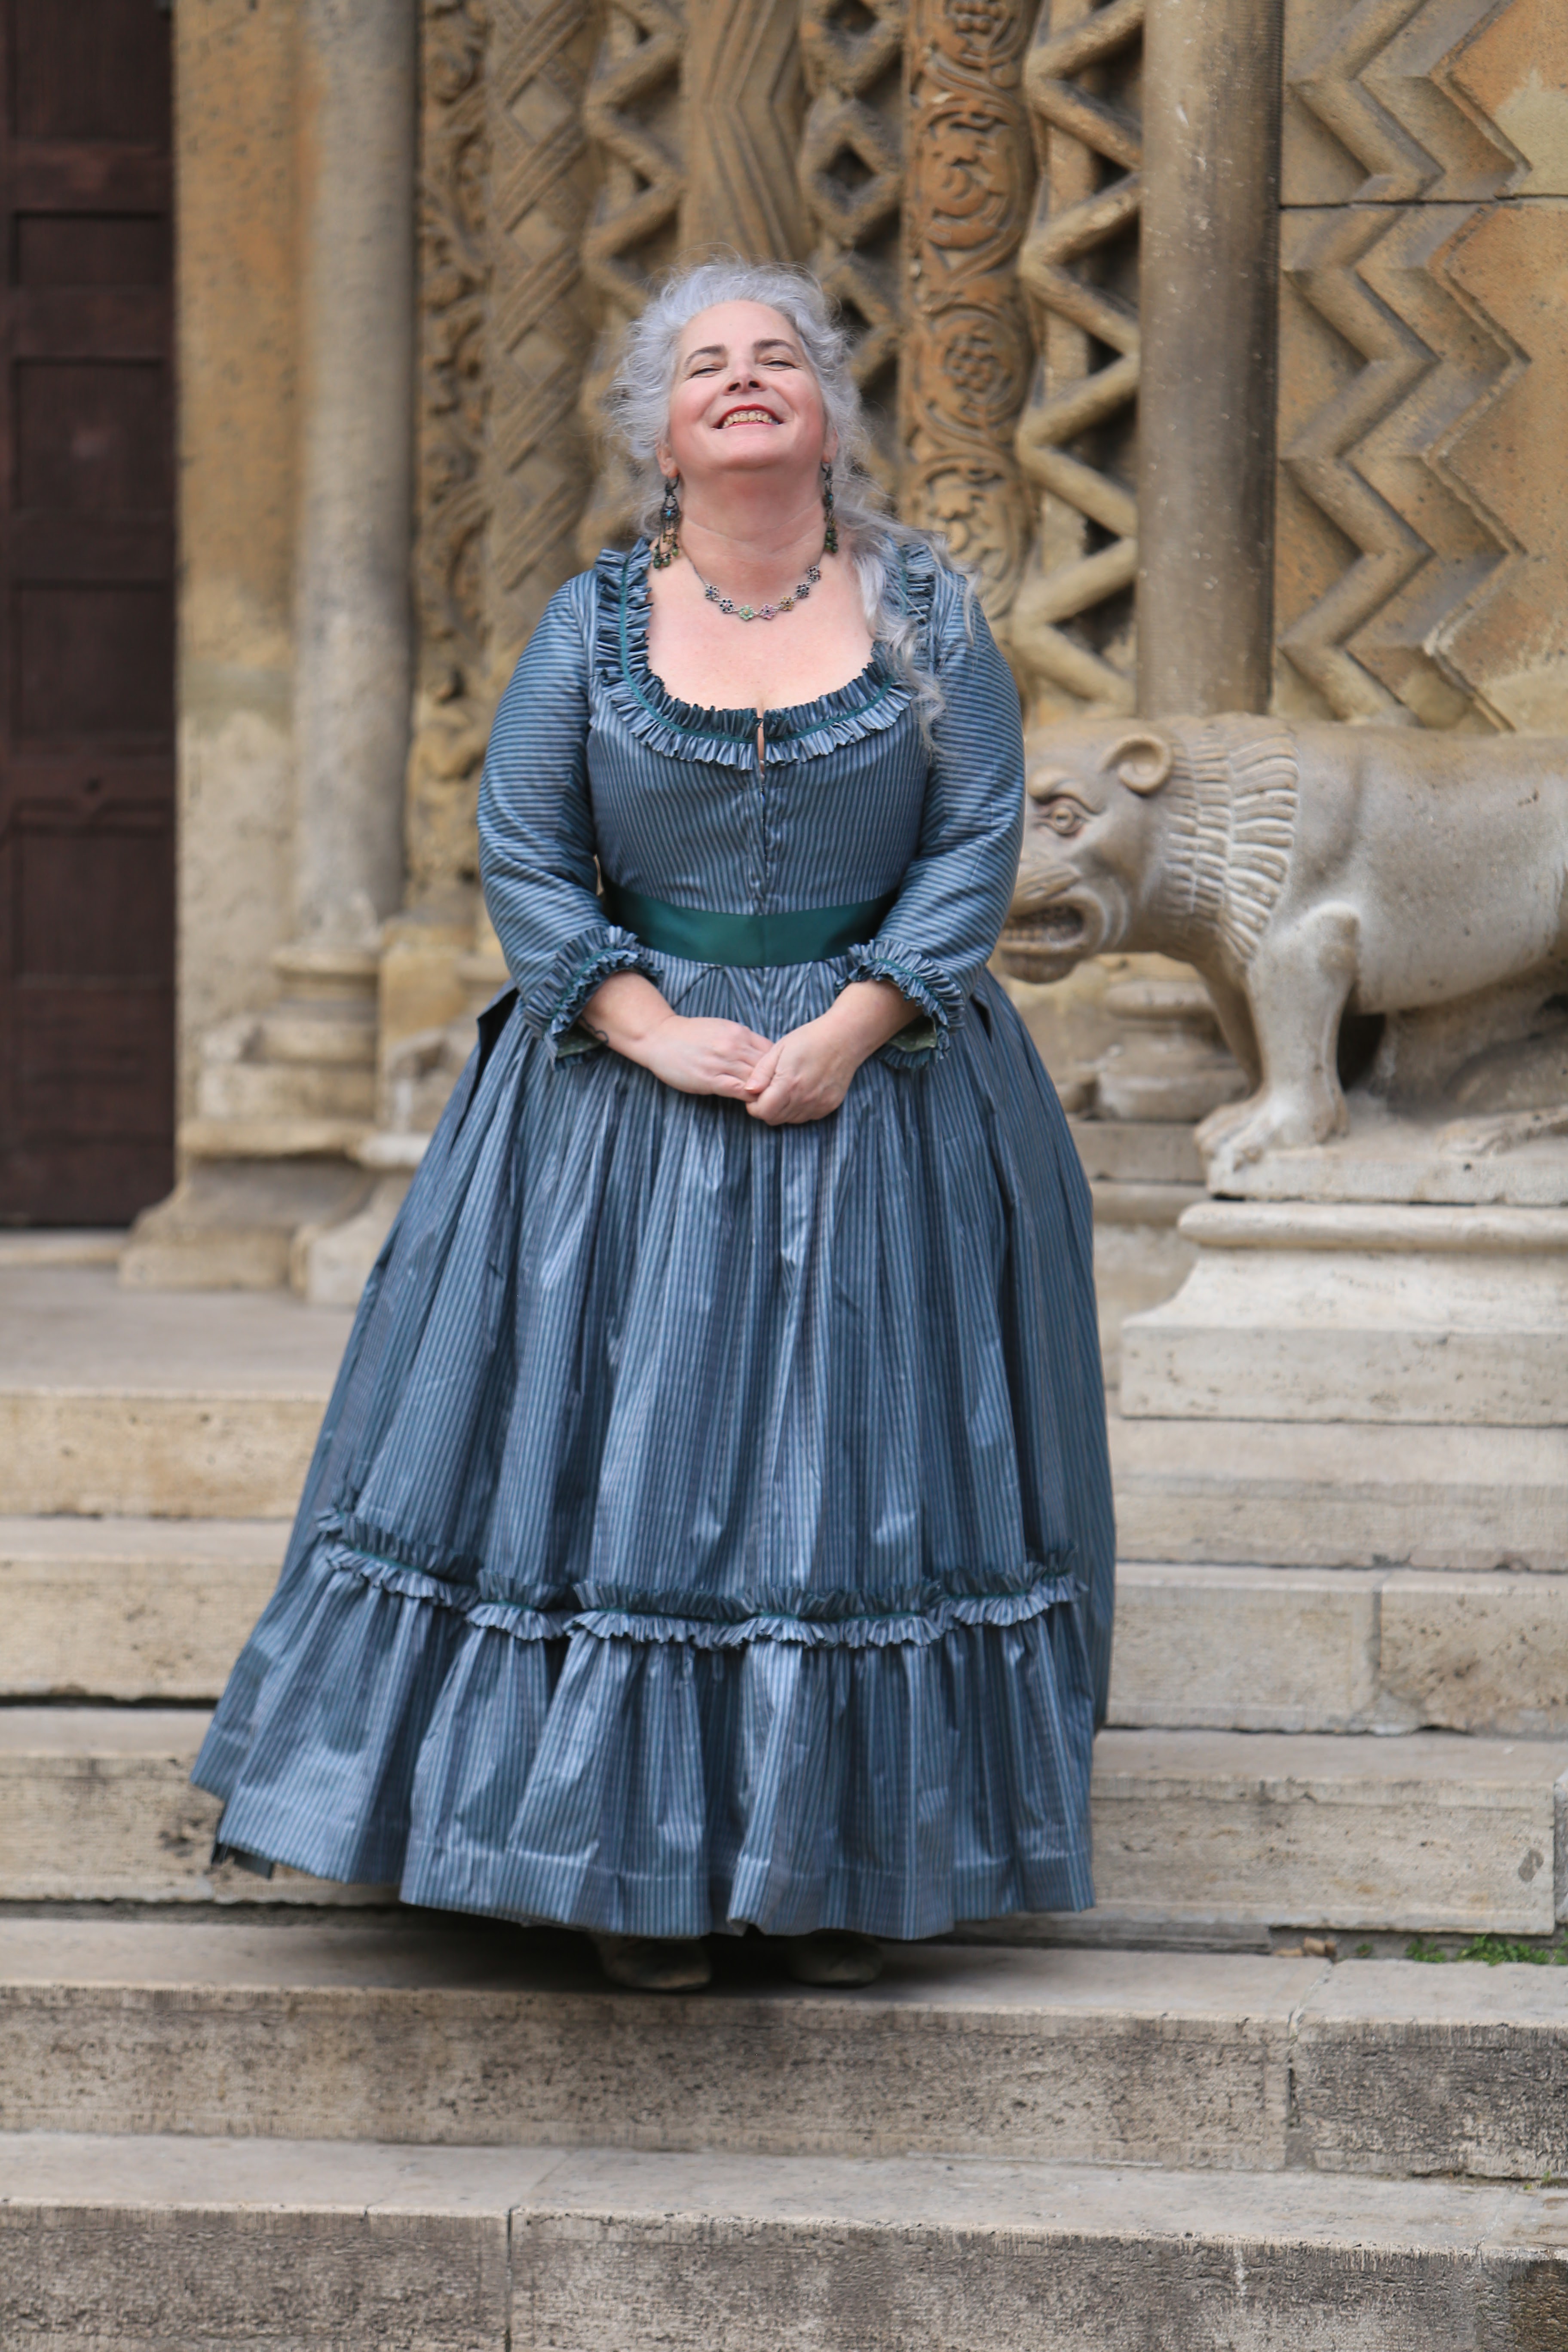
And its DONE. The Aidah gown.


It is done. Finished.  The test of the Aidah Gown by Scroop patterns and Virgil Fine goods.

Since this was a test, I was concentrating on sewing, and did not take many pictures. 

Let me just talk about the points that caused me concern, trouble, or needed extra concentrations. 

First of all, it is a great pattern, I've seen the testing on many different shapes, bodies, fabrics, and all worked out great. My concerns/troubles/extra attention needed was caused either my body not being a standard one, and/or by being stupid blind (more about on that later). The bodice itself was pretty straightforward, though I did the full mock up on straight grain, and then realizing that I did the red dress's front on the bias. (looking at the existing pieces, we can find both versions).

Discussing it with Leimomi, I decided on a somewhat off grain, but that still threw of the fit, I had to change back the front curve. Then I did the sleeves. Oh the sleeves.

 I spent  three day in sleeve hell. The truth is, I like to think about myself that while I am not that good at drawing patterns, and I am mediocre at fittings, I am pretty good at techniques (taking a chance of sounding full of myself, unless it is really technically tricky, the drawn up pattern is enough for me, I don't really need to read the instructions -I did for this pattern, the problem is not that.) I don't remember ever having problems with sleeves. Sleeve-hell, sleevils were words without any meaning for me. So, I think the sewing gods decided to teach me a lesson... Anyhow, I cut the sleeves as per pattern, tried it, as Leimomi pointed out it was a tiny bit too wide at the cuffs, so I took them in a bit, tried again - almost perfect. So I cut out the actual fabric, but following our discussion about grainlines, since I wanted my dress to have a bit earlier "feel" (reflecting more the beginning of the given time-period, than the end), I decided to cut the sleeves instead of parallel to the warp, cut it with crossgrain. And the sleeves DID NOT FIT. They were too tight. I really did not understand, I checked, I did cut exactly the same size as the mock up (took apart the mock up, and I used its pieces for pattern). Only after banging my head for a while, I thought of the fact that warp is usually a lot less flexible than weft. I shoud have known. I spin yarn and weave, I know how the texture of a fabric works (ask me one about the shirt of Father Ralph in Thornbirds LOL), I learned about textile structure in my technical school. DUH. And that was the only thing that changed, grainline, the warp across the sleeve (and not along the length) was enough that the sleeve did not snuggled up to my arm, but resisted it... I took one of the sleeves apart, added a cm, cut it out and sewn it up again, now had three sleeves. Then I spent two more days, because I mixed them up and tried to fit a left sleeve into a right armhole (yeah, I am a blind idiot). Took me many tries, (yes, there was some crying, I cantdothis, and threwing into a corner as well),  finally realizing what is wrong, and pinning the right sleeve to the right armhole. Then, so the sewing gods could make sure to make fun of me, after struggling for days -entirely my fault- Anna brought her jacket to rehersal, because she could not fit her sleeve into her armhole... and I pinned it in for her in like two minutes. 

The next hurdle was the pleating. My red dress had cartridge pleating, because… just because I like it, and because the Belgian original one I based my dress off, had one, but I know all too well, that knife pleating is much more common in the 18th century than cartridge. So I tried to figure out how many, and how deep pleats I needed to have to fit the skirt into the allotted place. Yeah, I know, there are tutorials and lessons  on calculating pleats, but hell, I am a philologist. I avoid calculus if I can get away with it, even if it means pleating 4,5 meters of fabric into a 60 cm wide space. Five times.


Sewing the skirt to the bodice was also different, than my red dress, there I cut out the space for the V shape of the waist and the top of the cartridge pleats were sewn to the bottom edge of the bodice… 

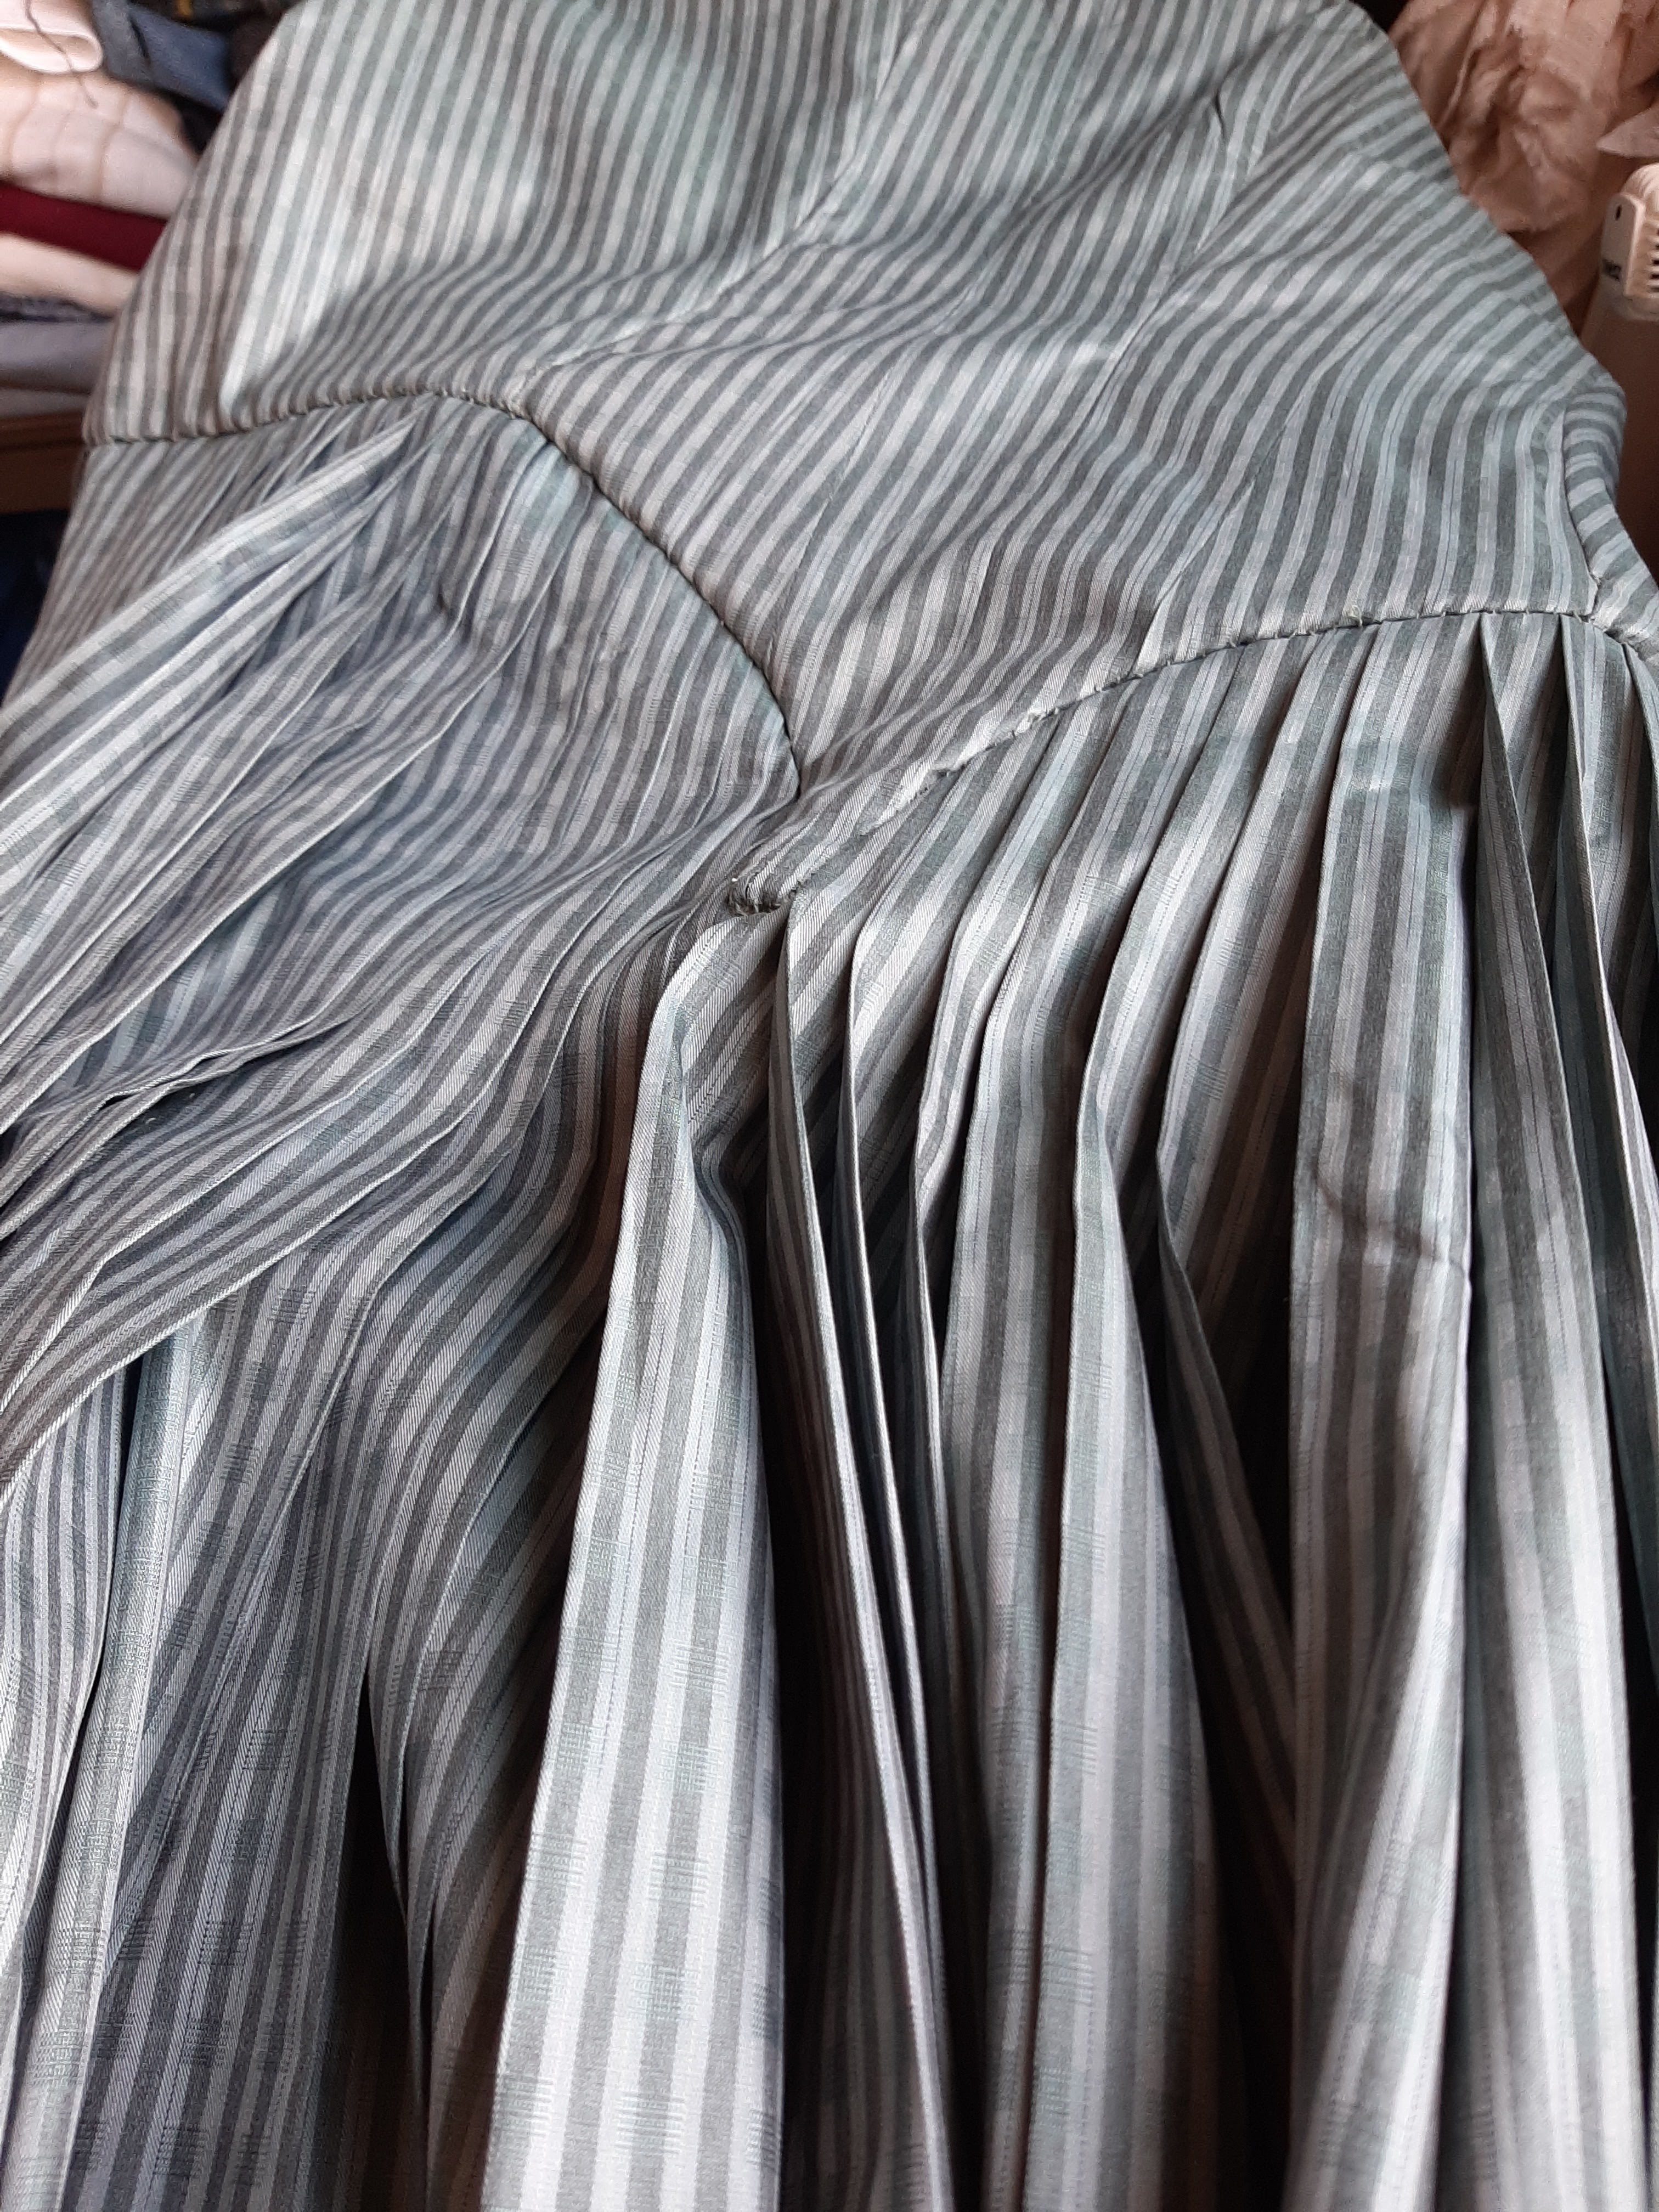
here I fitted the top of the skirt to a straight waistline, cut it open in the middle –which was not scary at all… not, not as scary as hell. Right. It was. but it looks like this on the inside.

Finally it was done, it fitted, and all I needed a petticoat and some decorations. It really seemed a good idea to have a ruffled petticoat for the dress… until I realized that it would mean hand-sewing 9 meters of hem instead of 4.5. But I did it literally in one sitting.  A long sitting consisting the second half of the first season of Carnival row, but one sitting, nevertheless. How did I stand up afterwards, you don't want to know.

Then I only needed to make like 6 meters of ruffles for decorating, easy-peasy. 

Even sewing the line of gathering stitches with the machine, it took me hours to pull the thread and arranging the ruffles more or less evenly. Added a line of silk ribbon to the ruffles, just to emphasize the greenness of the fashion fabric.

When all it was done, I still whipped up another petticoat, as though I have a white one I made for the red dress, according to the consensus of the 18th century sewing group of Facebook, the more, the better, and with this different kind of green striped one, I can still pull another look, if I want to.

So, what do I think of the pattern? I already said it is really great. I love the back with its narrow panels (though it works with wider ones too, if the pattern of the fabric would require that). I love that it has a front that is the same style as the dress I want to recreate (a bit later). I love that practically all of its component can be exchanged with the Angelica gown’s components. There is actually a lengthy blogpost about the similarities and differences of the two, so go and read if you cannot decide.

I also know that my dress has its faults, but that is most probably originates with my stupid struggles of the sleeves, and getting tired of taking them out yet another time.

In addition of adding a cm to the seams (because of the cross-grain), I ended up taking off about a cm from the sleevehead (as the sleeves were way to puffy). I also should have only added that centimeter to the lower half of the sleeve and not to the back of my biceps. I also should have taken the shoulder straps off one more time, and change its angle a bit more. (As a child, I was a swimmer first, then a rover, and I have a slight sway-back. Great combo, until you try to fit something on me. Especially, when yo live with two man who are terrified of sewing pins -so no help with fitting.)

As for sewing, I would use lining fabric with even more hold, than the cute little polka dot linen had. The flaps would certainly benefit from them.

The instructions for sewing the pattern –in fully authentic historic manner- are plentiful in the patterns. I’ve seen the revised final ones too since, they are even better. For me one of the difficulties was to adhere to the instructions as much as I could, because it was a test, after all.

The other thing I would change, I would include either instructions for either (mostly) machine sewing, or at least ideas, where could one cut at least some corners with machine sewing, but I understand that being such a complex pattern with as many sizes as it comes in, it would be difficult (even longer process) to include that too. However, if you want to save time, and would want to use machine sewing at least at some places, ask away, I will gladly give ideas. 

Was it worth doing the test? YESSS! It was a challenge to do it on time. 

Would I buy the pattern (even though I do have the Angelica)? YESSS! (in fact I am actually glad I did the test, because I did not have to wait for the pattern to be published, ny fingers were itching to do it.)

Would I do another test? Well, that depends. 

It should be something I really, really want to make, to make it worth for me to do something on time, adhere to instruction, etc, though admittedly I loved being part of the group, sewing people doing it on Instagram, and go “yess, I do that too, what do you thing about this or that?” and kind of sorry to have it end.


But definitely NOT sorry to have a new gown.

A varrós képek a telefonomról.
Modell fotók: Norbert Varga @Bodeszphoto


Saturday, February 18, 2023

Shift, chemise, undershirt, or what you will

 What do you do, when realize like two days before the planned photosession, that the linen summerdress you use in place for a shift has a neckline that is way too high? 

Yeah, sew one. 

I tried to read back, but I only found a fleeting mention of the summerdress I used as a shift. I bought it off from facebook, as you know, it was white and linen, which two reason would be enough for me to by something, ut it also looked deceptively like an 18th century shift. So much so, that when I got it, and it was hanging on the door of my sewing room, Norbert asked "What is that?" "What does it looks like? A linen summerdress" I replied. "But doesn1t it look like a historical undershirt?" "Right, sweetheart, that is exactly why I bought it!". And I used that happily under the red dress, but now, sewing the aidah gown I knew the neckline is too high, besides, I did wanted to sew a "proper" shift for a while. 

I had the light linen fabric, I mentioned here, the one I bought as a factory (even store) reject, as it was dirty, crumpled, etc, but I washed it. The smaller piece was used for that victorian corsetcover, and I used the bigger piece for this shift.


I did check the Simplicity 8579 pattern by American Duchess, only to realize that the package I have is for the smaller sizes. However, it is basically rectangles, triangles, so I took my existing dress/shift, compared to the pattern, and drew up a new one for more or less my size. 
As I started it like 10 PM, and wanted to finish it as soon as possible, I don't have many pictures of the construction. And as straighforwards as it is not much to tell about it either, but in the name of regular blogging here you go. 
As usual, I sewn the major lines with the machine, but tacked down by hand.

I know, proper french seams, and felling stitches would be more historically accurate, but I did not wanted any machine seams show, even on the inside of the shift.
Perfect points of the underarm gusset.
Hem is sewn down by a... whatever the stitch is called (is it ladder, prick or hemstitch or something else?) Anyhow, back many, many years ago, my mother used it to repair a jacket for me, and I love it. 
The neckline is finished with a bias strip, once again, I know that turning down the edge is perfectly HA, I love how nicely it lies down. 

Thats it. A one day affair, even with all that handstitching, who know, maybe sometimes I will sew a whole shift by hand, just for the heck of it.


Monday, February 13, 2023

Bombed

 My sewing room, that is. 

Back in a while , when I asked what should I write about, you said anything... so here you go.

I had enough of having stuff, but not being able to use it, because it is piled up in boxes. Those moving boxes Kika (the furniture store almost across the street) selles, worked well, but the ones bought later (after Kika was sold, and became the "Sex-store" -well, actually, it is a part of another furniture store chain, that goes by the name of XXXL Lutz... which completely sounds like a name of a sex-toy-store, and we call it just that in between us. Imagine when I ask my son, "Hey, sweetie, do you want to have a lunch at the sex store?" LOL) (They do make a fair enough wiener Schnitzel).... anyhow, the boxes XXL Lutz sells, though the same sice and style, does not hold up to use like the old Kika one. Packed on each other (full of fabric) they started to crumple, and every time I went close I was afraid of the whole pile falling on me. Besides, no use to storing fabric stash, if I cannot get to it easily, right?

So in the midst of testing the Aidah gown, I decided to buy a shelf, that came a week earlier than expected. Norbert being Norbert wanted to put it together at once (the man does not know the meaning of future tense). So when do I drag half a fabric store worth of stuff across the flat? About 4-5 times? When I would need to sew. Right. 

However, to fit the shelf in, I would have had to taken out a small cabinet kind a piece, that used to be part of my father's writing desk. I grew up with my dad working on it. When we moved from one flat to another (being a military kid, we moved surprisingly few times)he bought a big, colonial style desk, and I inherited his. I loved it and had it in my room ever since. The writing desk/board part itself is gone by now, at one round of flat rearranging PJ managed to get rid of it somehow (well, he knew I loved that old dask, and he hated- I guess still hates- my dad), but I still have the pieces that held those board. 

Anyhow, as much as I loved that desk, I had to resign to take it out of my room, in order to make space for the shelves (and get rid of the danger of those boxes falling on me). I told N, we could take it down to his father, who lives in a house in the country, and probably could use it in his workshop, so it would not be literally threwn out, but still used. 

Spent a couple of days taking all the fabrics out, Getting the shelf in, going through those boxes and decide what should stay, what should be taken down to the cellar, what should be threwn out (NOT farbric, mind you), and starting to full the shelves, including those fabrics, lying around in bags, and piles. 

At the end, with leaving out what I am planning to use in the near future, what was left was just enough to fill that small cabinet. 


That was when I hauled out those fabrics yet again, and we started desparately to measure and calculate. The thing is that the only reason it did not fit was that I changed my old serger (interlock), and the new one had a bigger table. What if we turn this that way, and slide that one there, can we gain a few centimeters if we... 

Until it all fit. Okay, Now, I have less space at my interlock, but I rarely use it anyway. I still has a small space besides of the regular sewing machine (sewing big dresses, it is not a disadvantage), and my old household Neumann I use for buttonholes got dug out from under the pile of fabrics and other stuff too. Yesss! I cannot tell you how glad my heart was to be able o hold on to that small piece of my childhood. And have a space to put the steam producing part of my iron, and have it NOT to take up third of my ironing board. 

You would think that was enough, right? By then my back was hurting like hell, I was limping, my arm-musle with the misterious pain flared up. But I still took the ladder, and took down everything from the shelves above the machines.  It was put up by PJ, let's not talk about the quality of the shelves themselves, I wish I could take it down and change it to a more stable one, but at the moment I cannot. It still works though and those bits of stuff I store there (boxes with buttons, zipps, ribbons, and such) is not that heavy. However, it was not rearranged / cleaned properly in ages... You really don't want to know the stuff I found there. Like tags to a brand I sewd for before Chris was born. Stuff that came home wih me from the US (in the nineties). Shall I go on?  Now I took down and went through everything, purged what was there made order in the rest of the stuff, and got them back up. 

Now, things are back on track, the sewing room is much better organized now. So much better feeling to go in. Of course, there are still things that could be improved, and it is nowhere near to the sewing rooms you can see online, but that is for now. 

Back to regular programming (is there such a thing?) with the next post.